Featured


Chef chops lemon in half for his summer pasta recipe that’s done in 10 minutes
Ready for a perfect summer dish that’s quick, easy, and refreshingly delicious? Say hello to Spaghetti Lemonade, a light and lemony pasta recipe that will make your taste buds dance. Let’s dive into what you’ll need: spaghetti, a lemon, unsalted butter, and freshly grated Parmigiano Reggiano. Start by boiling a pot of water for the...
Michael Dabu
06.20.24
Stay up to date on the latest stories on Sweet & Savory.
By signing up, I agree to the Terms and Privacy Policy


Thanks for signing up!
You're now subscribed to the latest stories.
Recipes
Simple and puff pastry recipe is sure to ‘wow’ guests
Michael Dabu
06.18.24
Recipes
Woman finds a delicious use for her overripe bananas and it isn’t banana bread
Michael Dabu
06.13.24
Recipes
Mom shows how she ate for only $1 a day and it’s perfect for a tight budget
Jake Manning
06.12.24
Food Hacks
Put your avocados in a beer koozie plus 39 other surprising food hacks
Eduarod Gaskell
06.11.24
Recipes
Woman cuts pork loins into 3 strips and braids them with bacon for a delicious idea
Michael Dabu
06.07.24
Food Hacks
Woman dumps 2 common ingredients in foil and wads them up for helpful housekeeping tip
Elijah Chan
06.04.24
More Top Stories
Recipes
Recipes
Overlap 7 tortillas in a pan then stuff it with cheese to make a giant crunchwrap supreme at home
Eduarod Gaskell
02.27.24
Recipes
Add pork to a layer of onions on a sheet pan for a flavorful dinner that can be prepped in 10 mins
Eduarod Gaskell
02.26.24
Recipes
Man fills a plastic bottle then demonstrates easy way to make a delicious and impressive dessert
Eduarod Gaskell
02.26.24
Recipes
6 easy homemade chicken marinades that are guaranteed to give boring chicken a flavor boost
Eduarod Gaskell
02.26.24
Recipes
Got no time? Mom shows 10 incredibly easy ways to use canned biscuit dough to make a tasty meal
Rozzette Cabrera
02.26.24
Recipes


Spongy ‘melt-in-your-mouth’ lemon cake recipe only takes 15 minutes to make and is delicious
If life hands you lemons, turn them into a delightful lemon cake. That’s the ingenious plan of this YouTube content creator whenever she finds herself with an abundance of this tangy citrus fruit. When it comes to citrus-infused treats, few can rival the irresistible taste of a well-crafted lemon cake. In a recent video shared...
Jenny Brown
02.23.24


Man stuffs jar full of Saltines so he can make Mississippi “Swamp Crackers”
Jessica Adler
02.10.24
Recommended for you
Holidays
Holidays
Guy shows how to make “fast and easy” holiday treats with just a handful of ingredients
Jessica Adler
11.14.23
Holidays
Woman shows the easiest way to add a touch of festivity to holiday appetizers
Sheehan Diapues
12.14.22
Holidays
10 super festive holiday desserts to eat while waiting for Santa
Megan Bennett
12.12.22
Holidays
This bacon-wrapped turkey breast takes holiday meals to the next level
Caryl Jane Espiritu
11.10.22
Holidays
Simple recipe for the “best sugar cookies” earns over 11 million views online
Sheehan Diapues
11.03.22
Recommended for you
Reviews
Reviews
Man leaves glasses of Coke and Coke Zero out for 100 days to see what happens
Jessica Adler
01.05.24
Reviews
Food historian follows recipe for “bread in a can” and gets 1.7M views
Jessica Adler
12.05.23
Reviews
Teens visiting from Britain try out biscuits and gravy for 1st time and get 8.8M views
Jessica Adler
12.01.23
Reviews
Korean woman films her parents trying “soul food” for the first time and it’s adorable
Jessica Adler
08.09.23
Reviews
Jon Stewart’s hilariously savage 3-minute rant against Chicago-style pizza never gets old
Luis Gaskell
07.27.22
Reviews


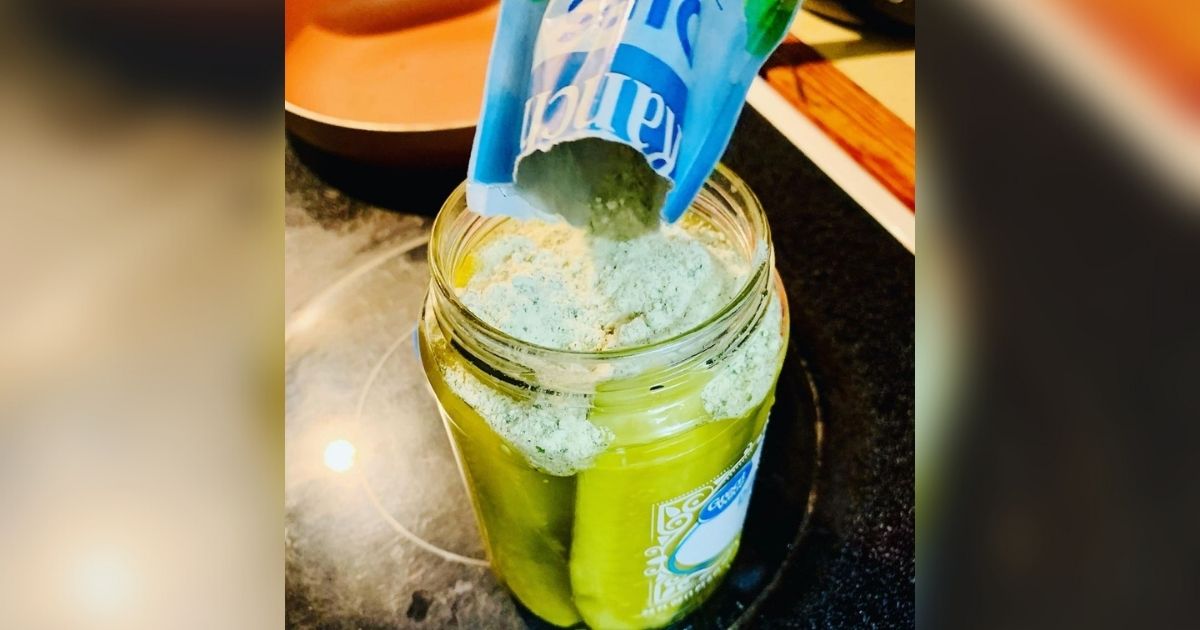
People are dumping ranch seasoning packets into pickle jars for a tangy twist
Every day you’re in TikTok, you’ll discover something new. From information and trivia to life hacks that you’ve never heard of. Anything you discover there is always worth the try. Since the height of the pandemic and even until now, people have run to TikTok for things they can try at home and fight boredom....
Cherie Gozon
08.26.21


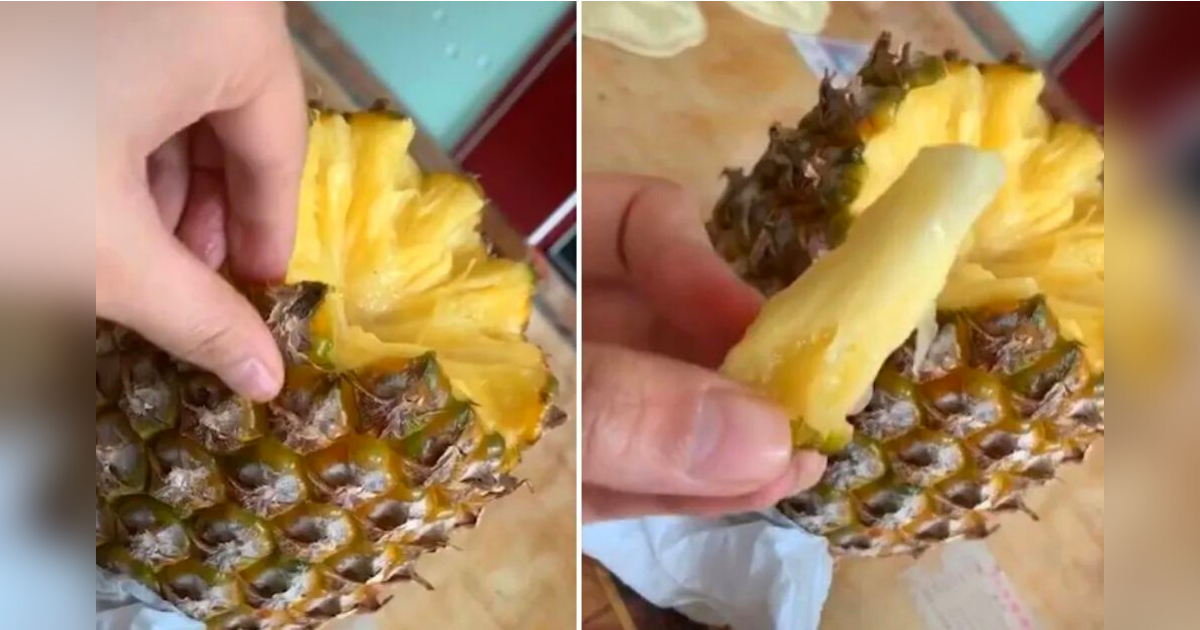
It turns out that we’ve been eating pineapple all wrong
Kate Miano
07.20.21
Recommended for you
More from Sweet & Savory
Recipes


Recipes
Mom shares easy snack recipe that her entire home devours
Michael Dabu
05.21.24
Recipes


Recipes
Woman shares recipe for delicious potato dish that tastes ‘better than McDonalds fries’
Michael Dabu
05.17.24
Food Hacks


Food Hacks
Man gets out hair pick for genius kitchen hack that makes things a breeze
Jake Manning
05.16.24
Recipes


Recipes
This bacon-wrapped chicken on the grill recipe is a total game changer
Jake Manning
05.15.24
Recipes


Recipes
Add yogurt to boiling water for a dough recipe that’s earned over 10 million views
Michael Dabu
05.15.24
Food Hacks


Food Hacks
Grandfather taught me to just add Coca-Cola to flour for a baking hack few people know about
Elijah Chan
05.14.24


